Quick Start
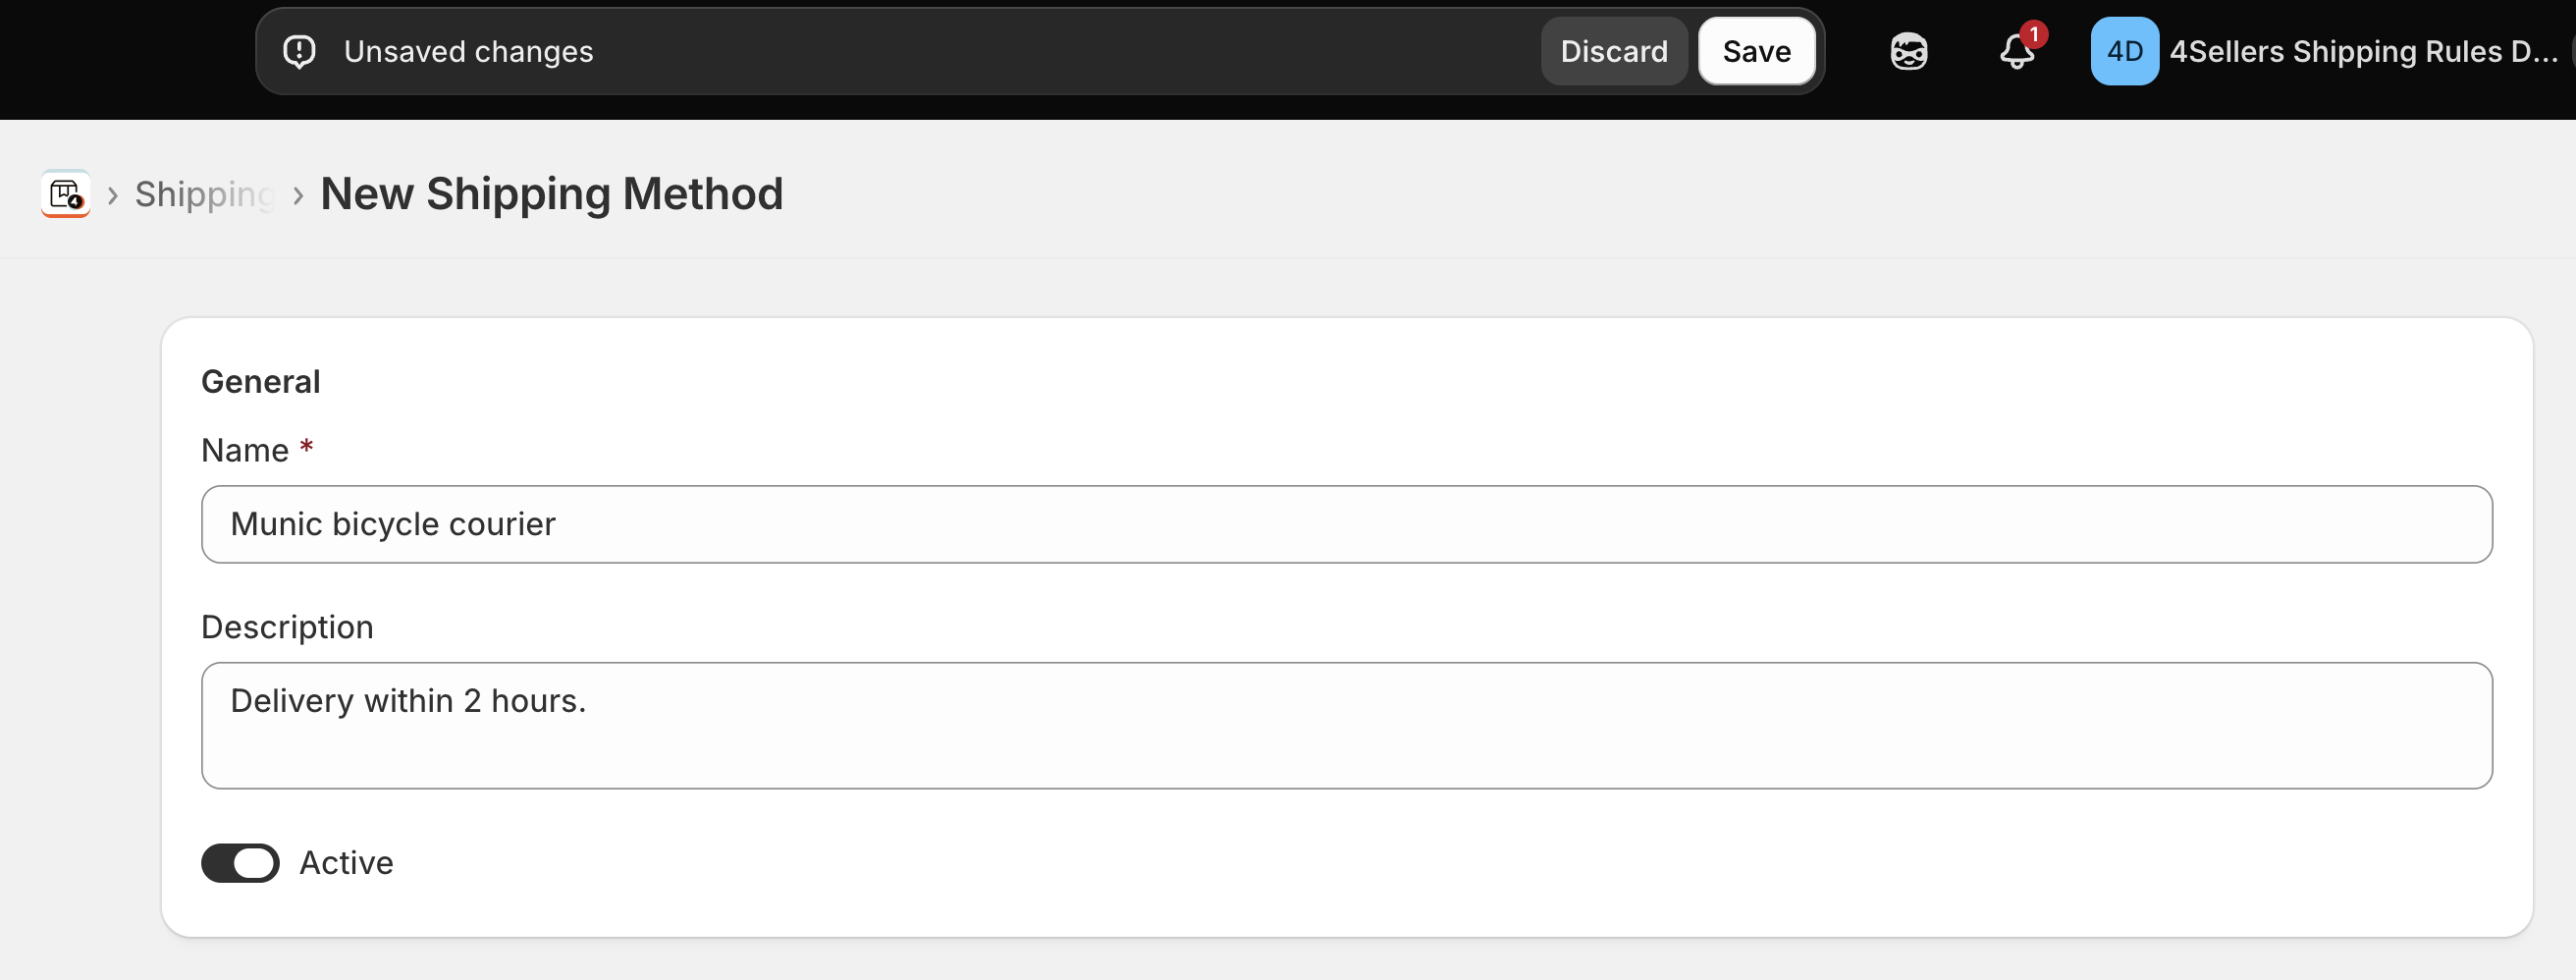
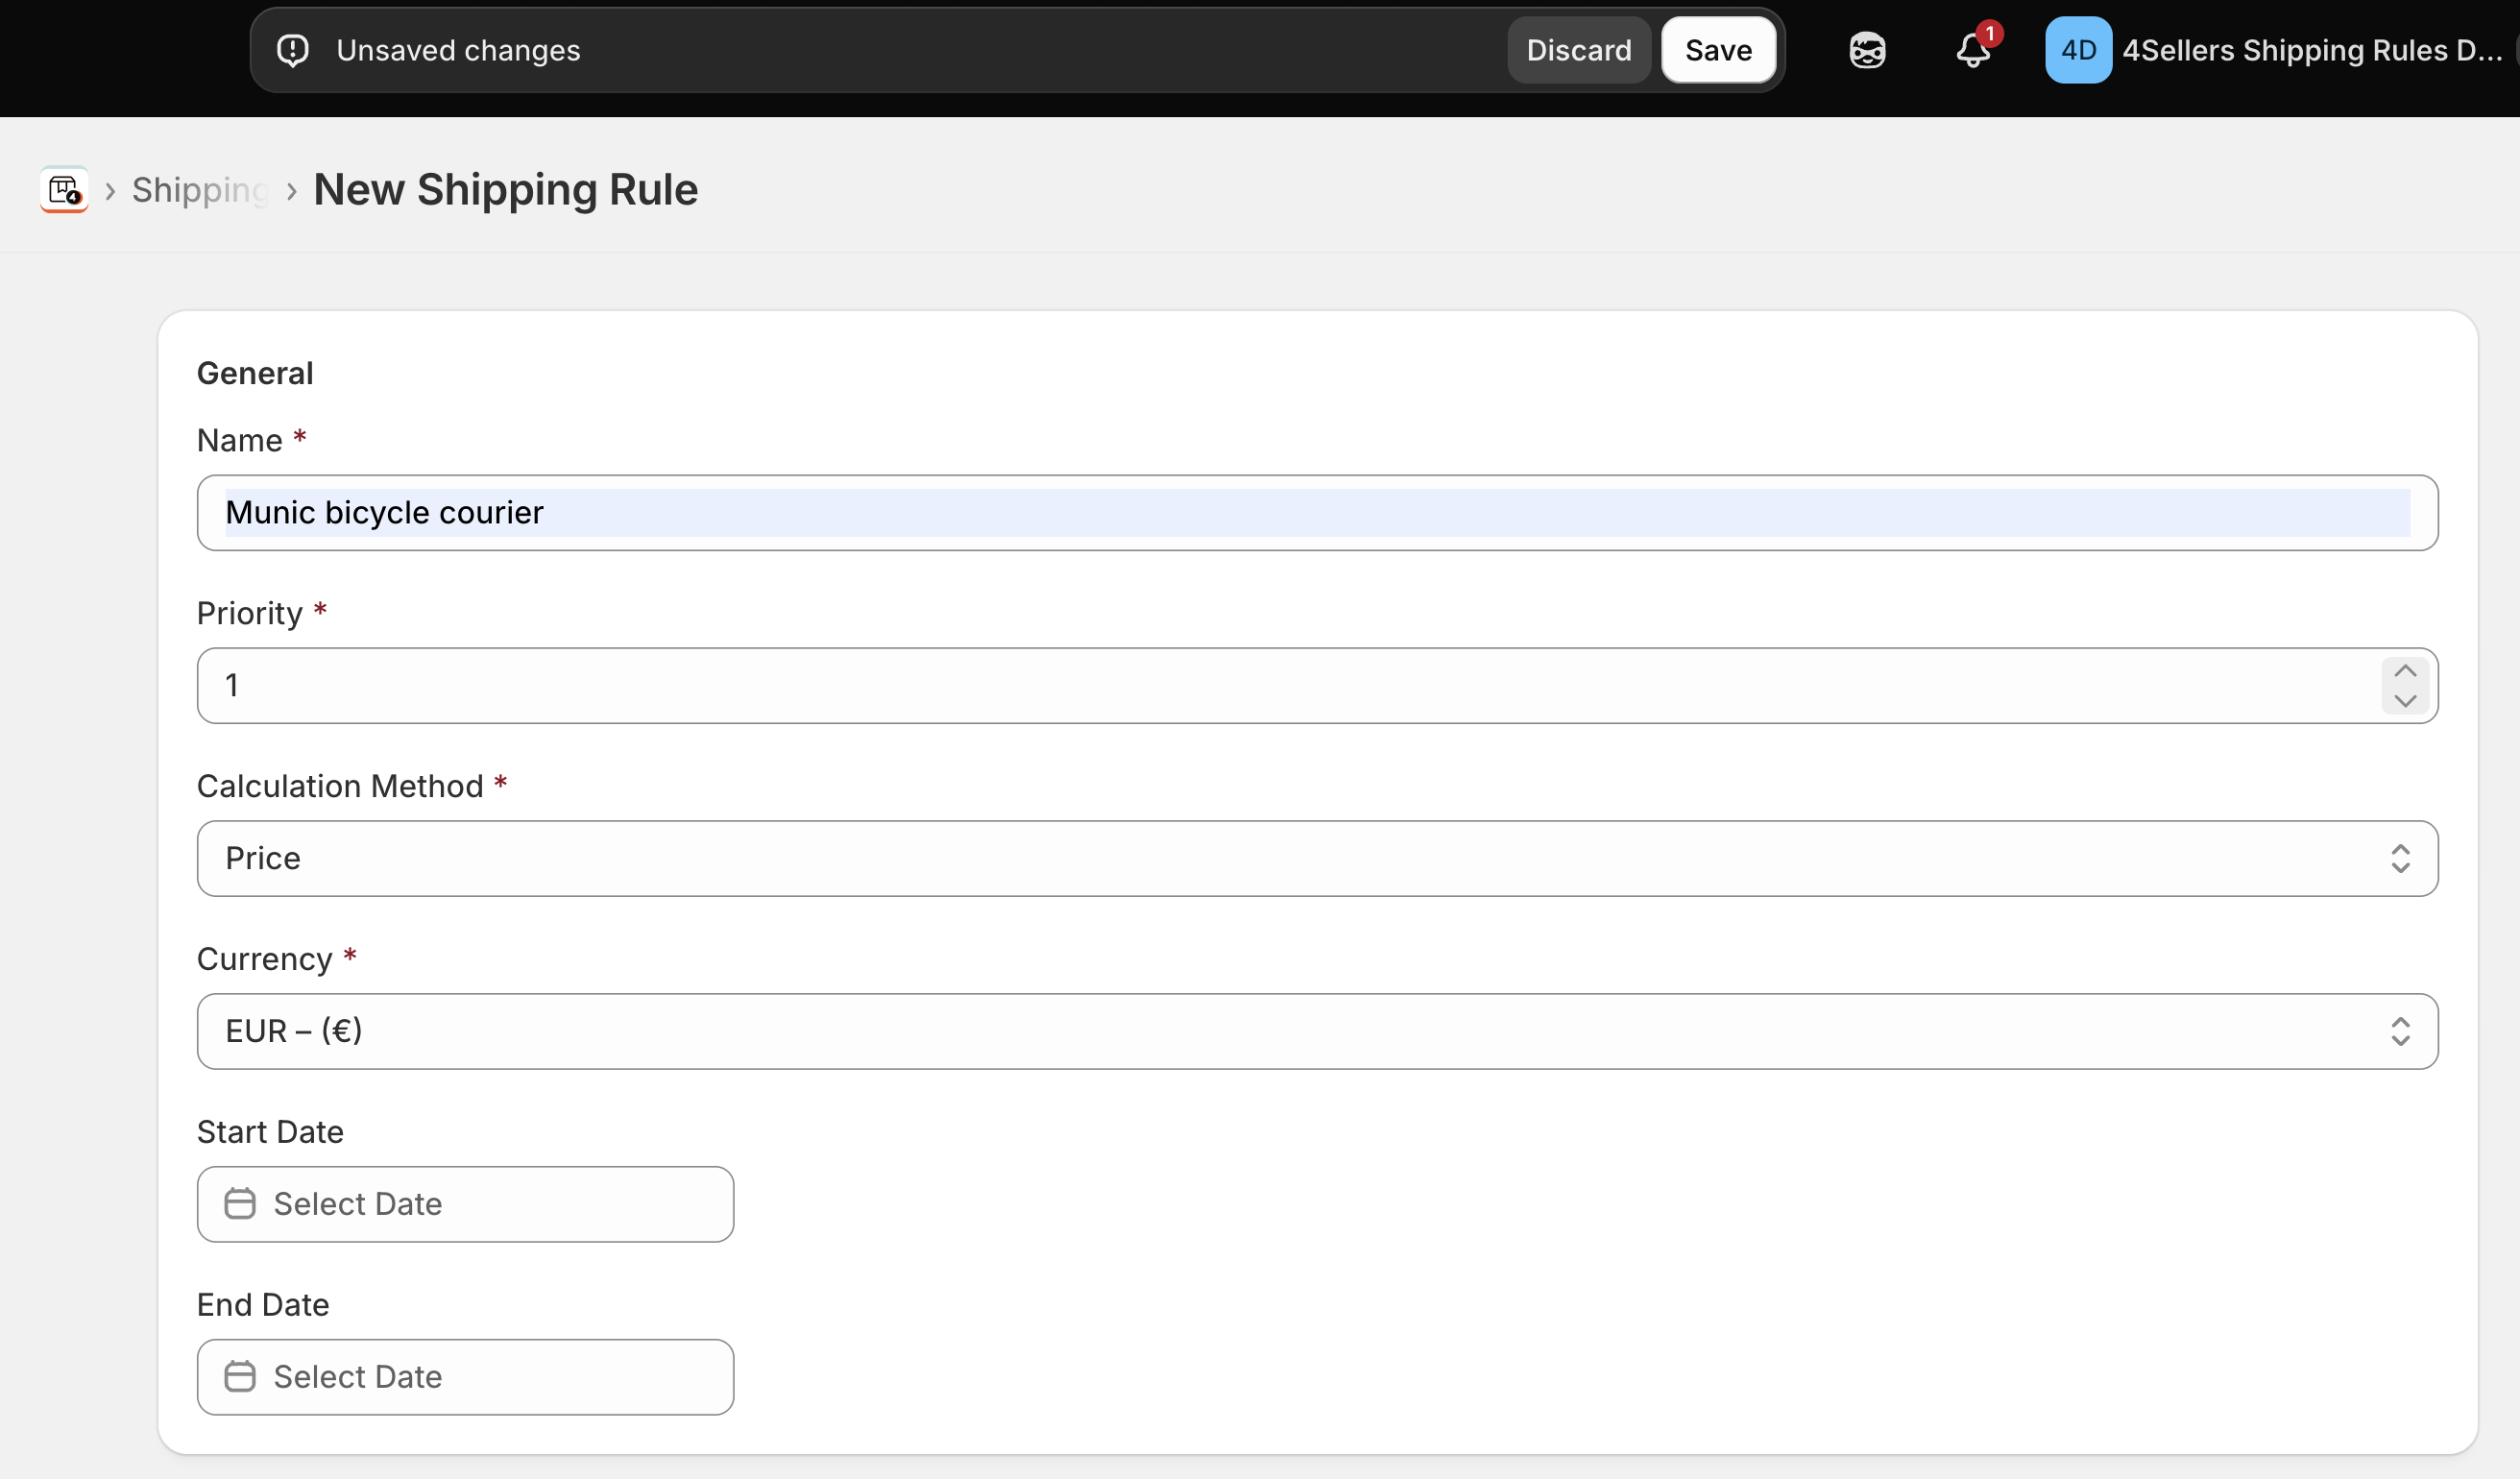
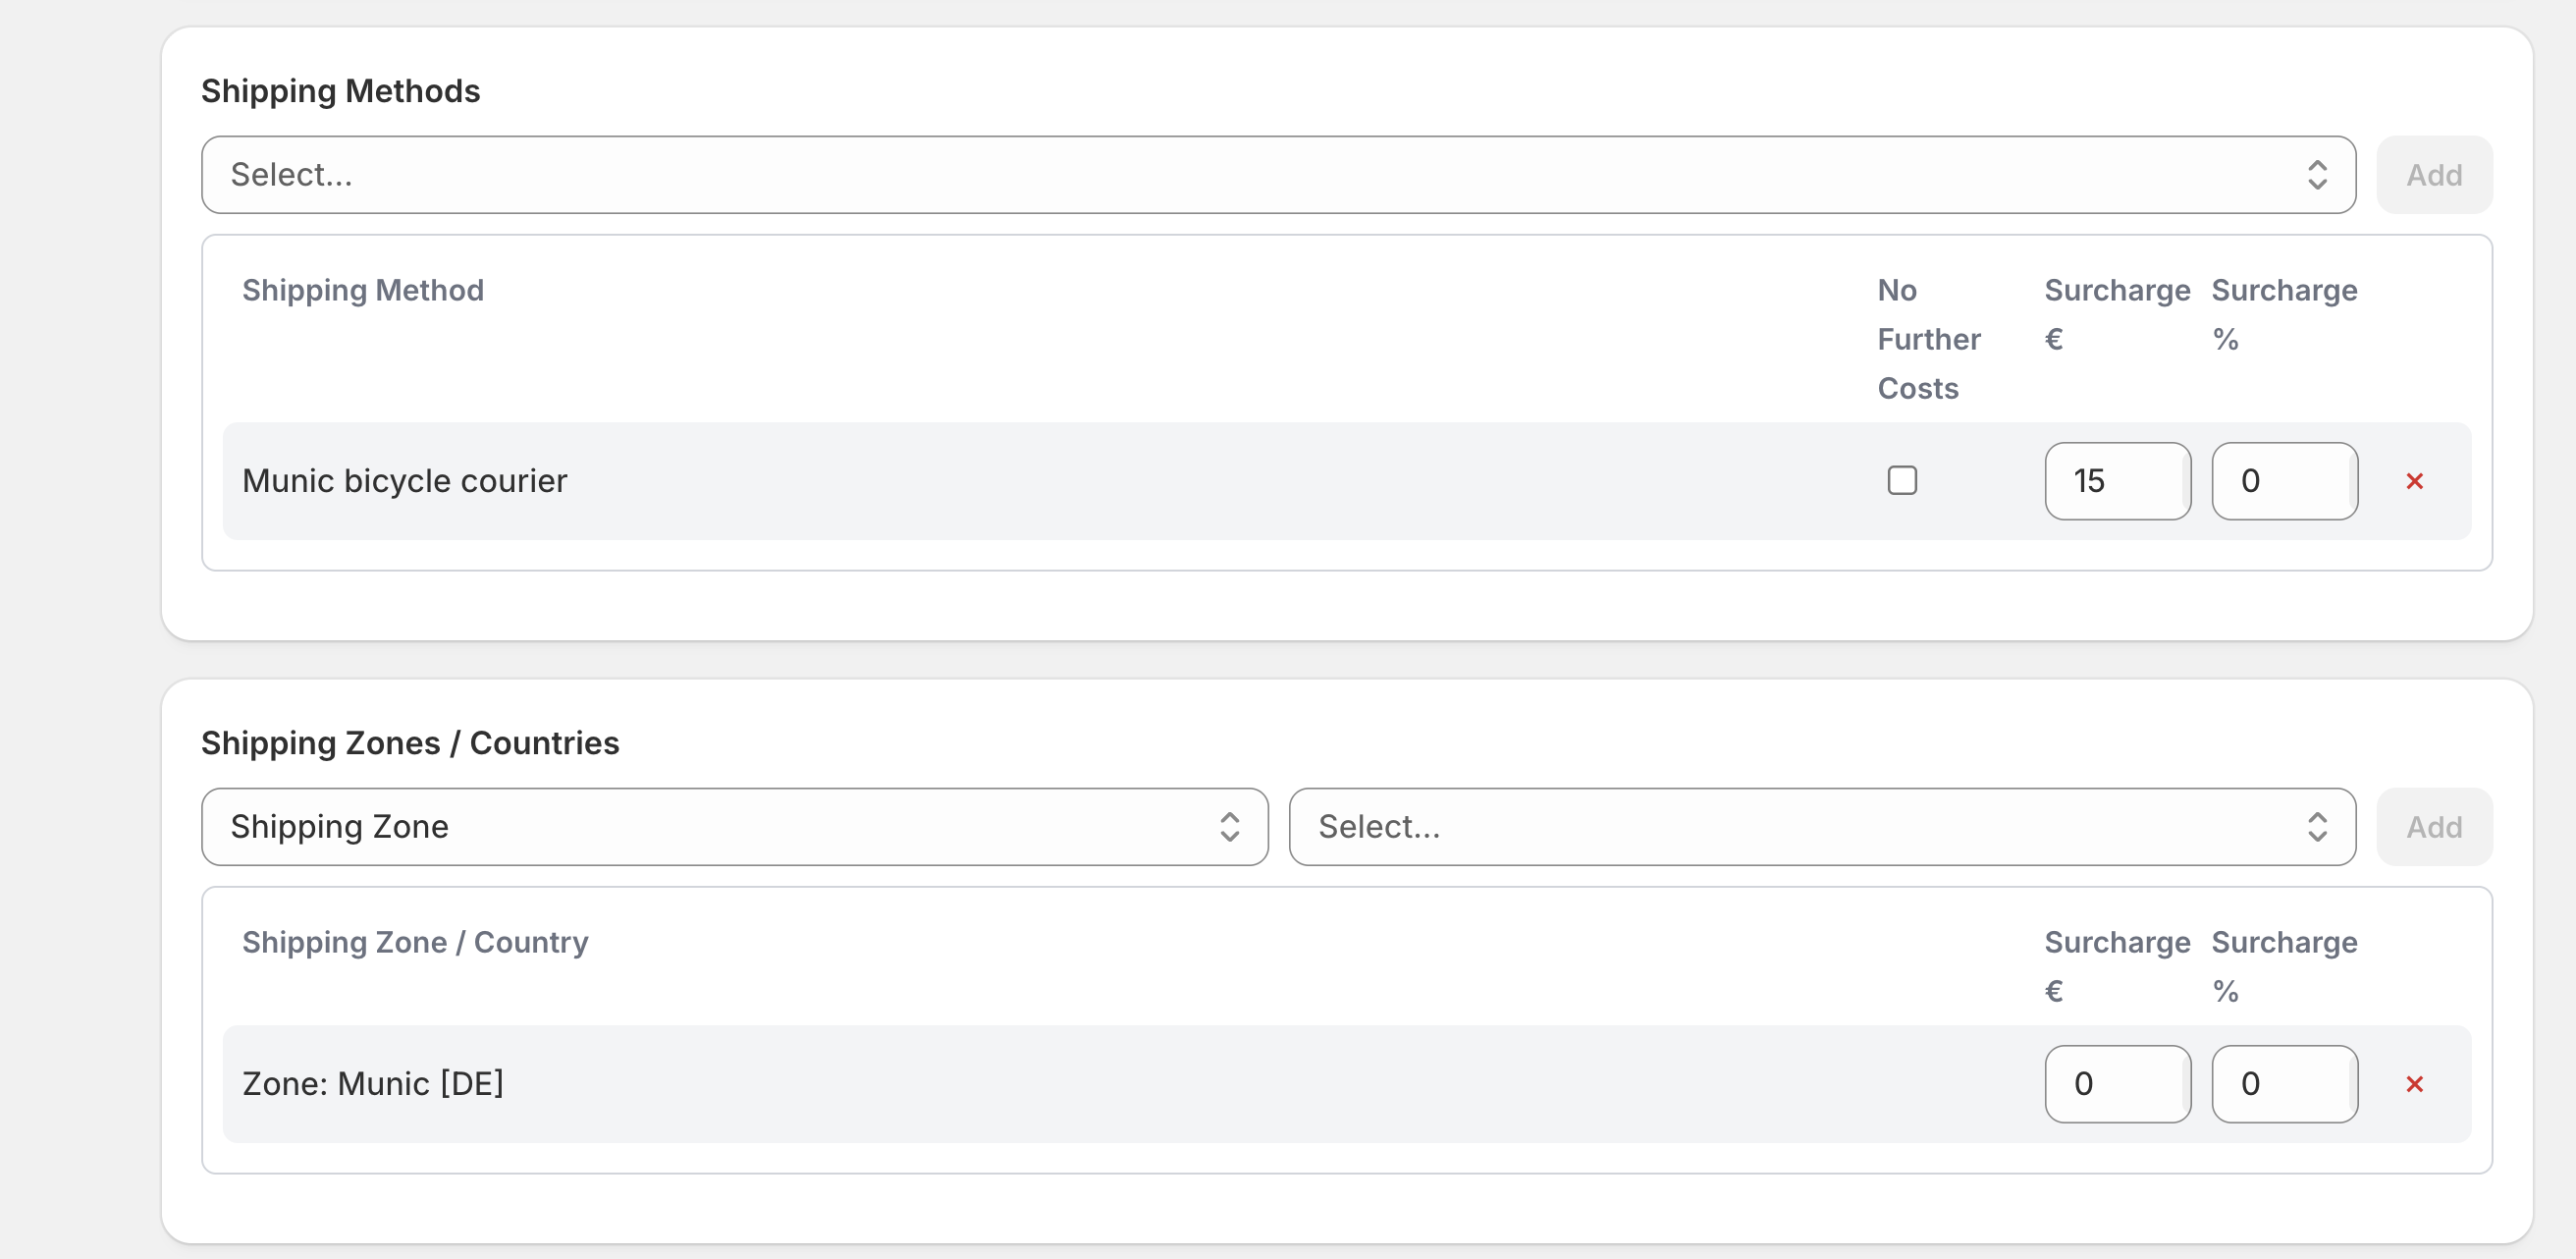
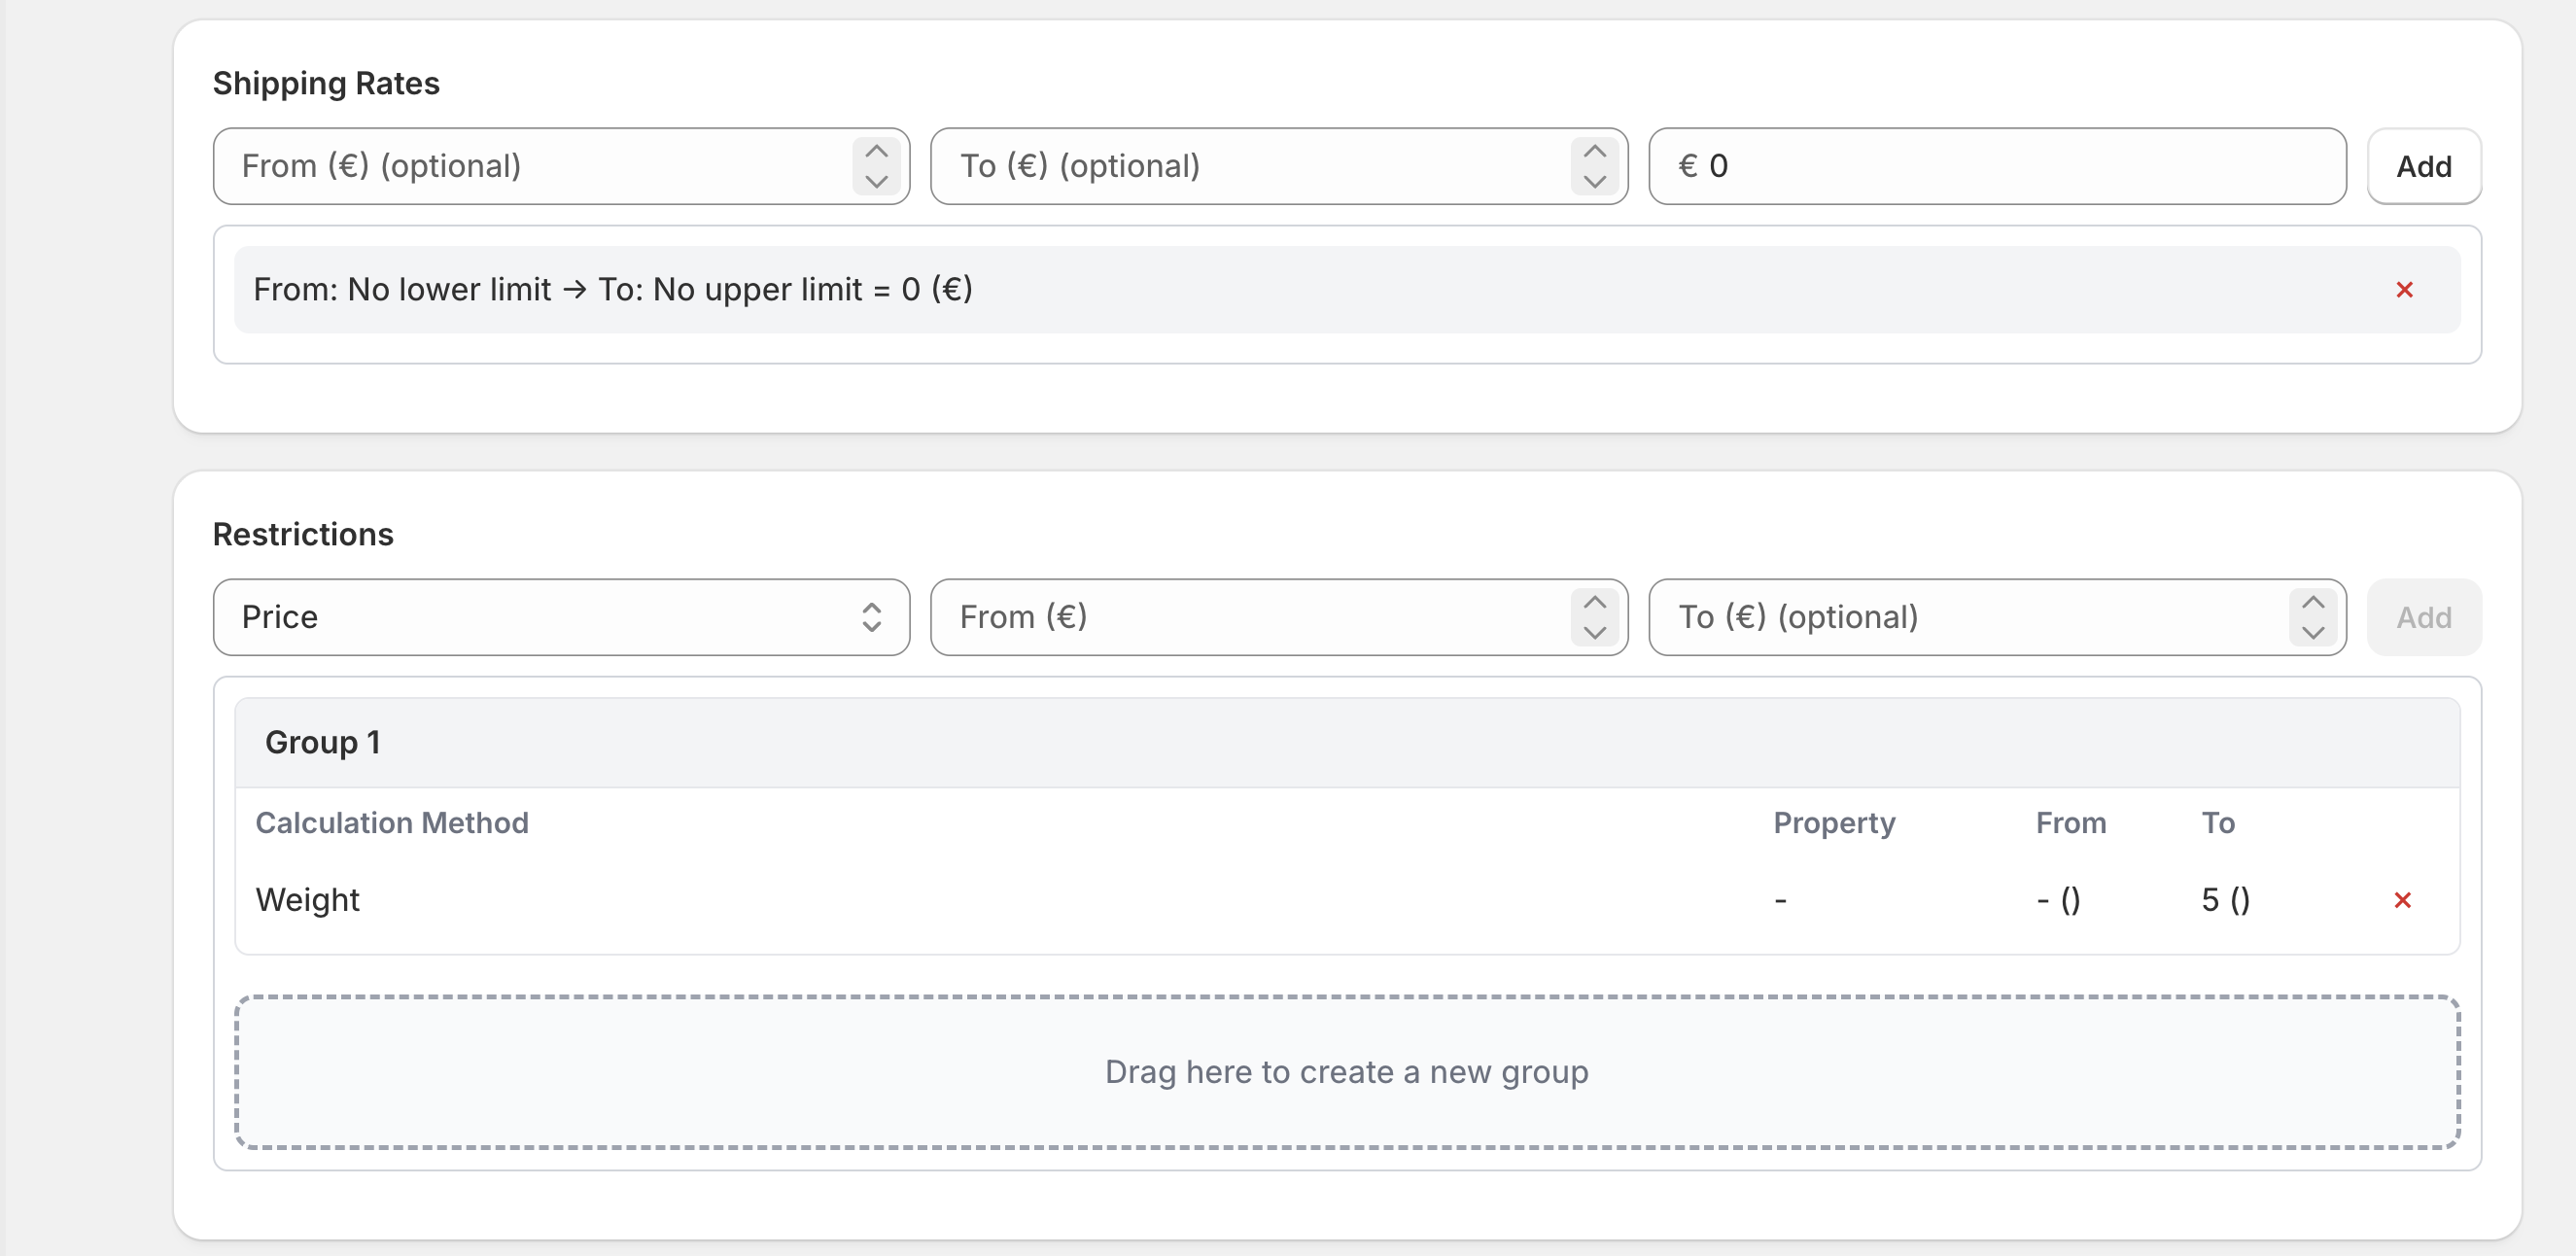
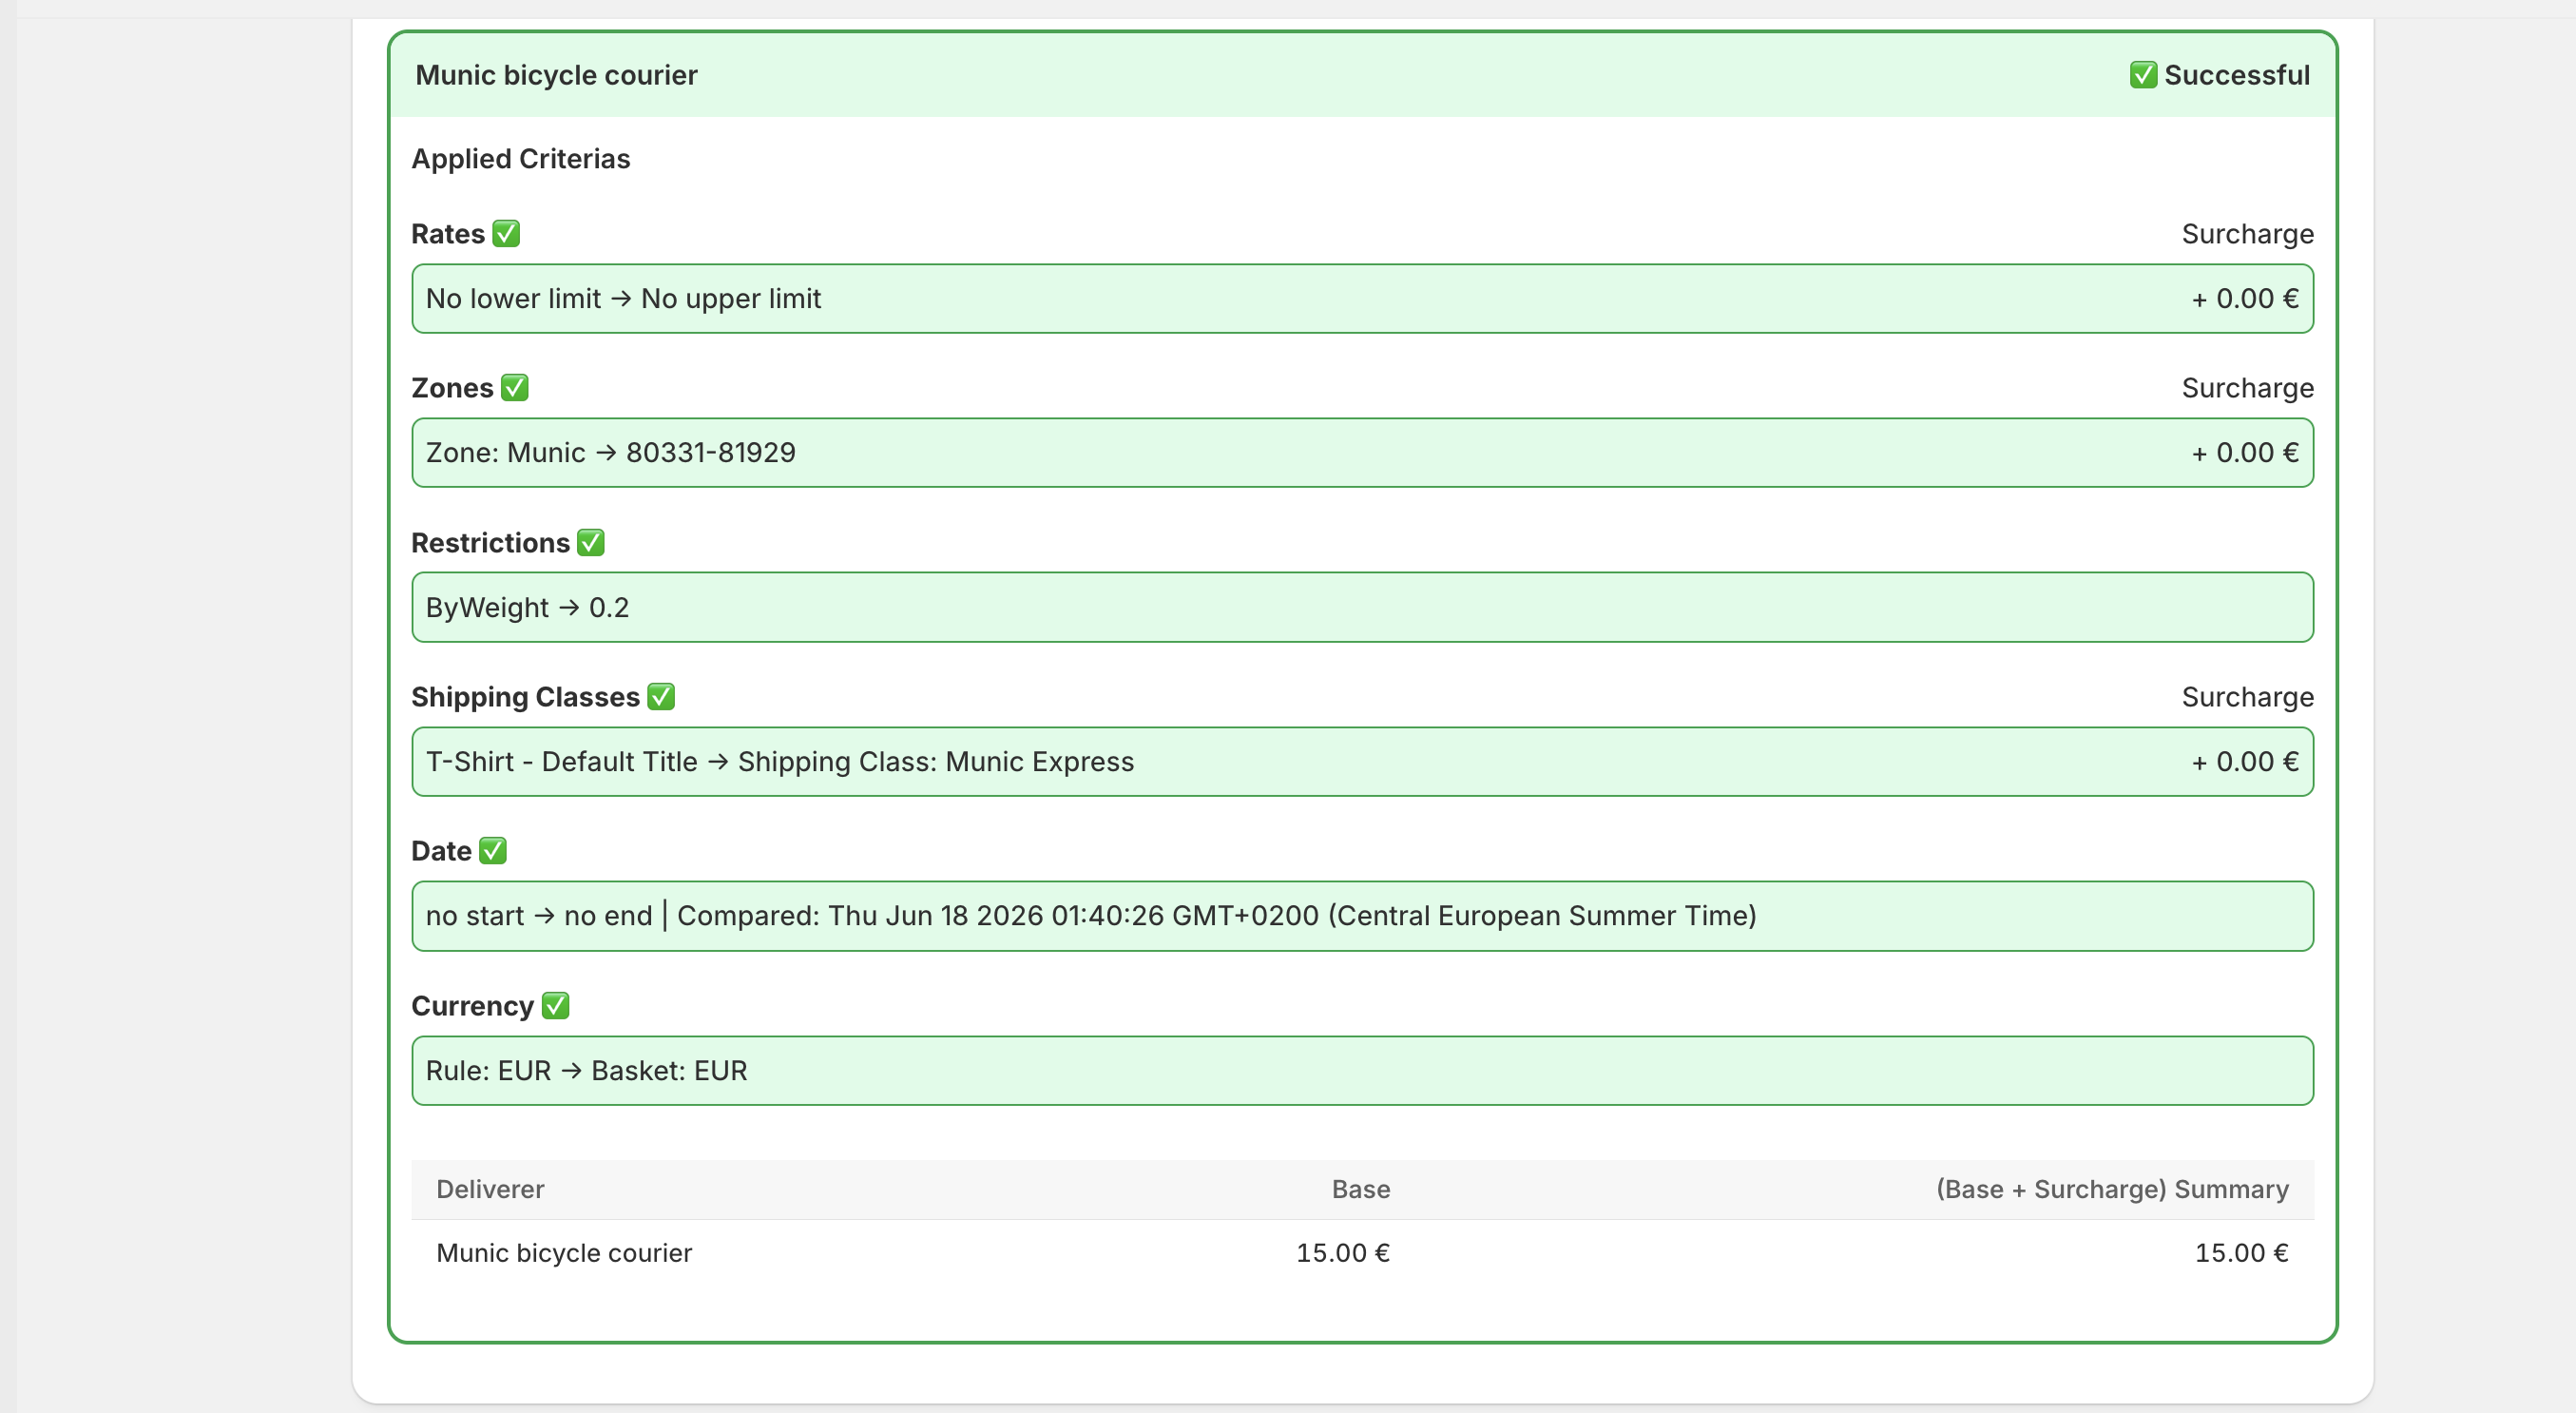
Follow these steps to set up your first shipping logic. In this example, a bike courier is offered for the Munich city area, delivering within 2 hours. The order weight is limited to a maximum of 5kg, the postal code area is specified, and a fee of €15 is charged.
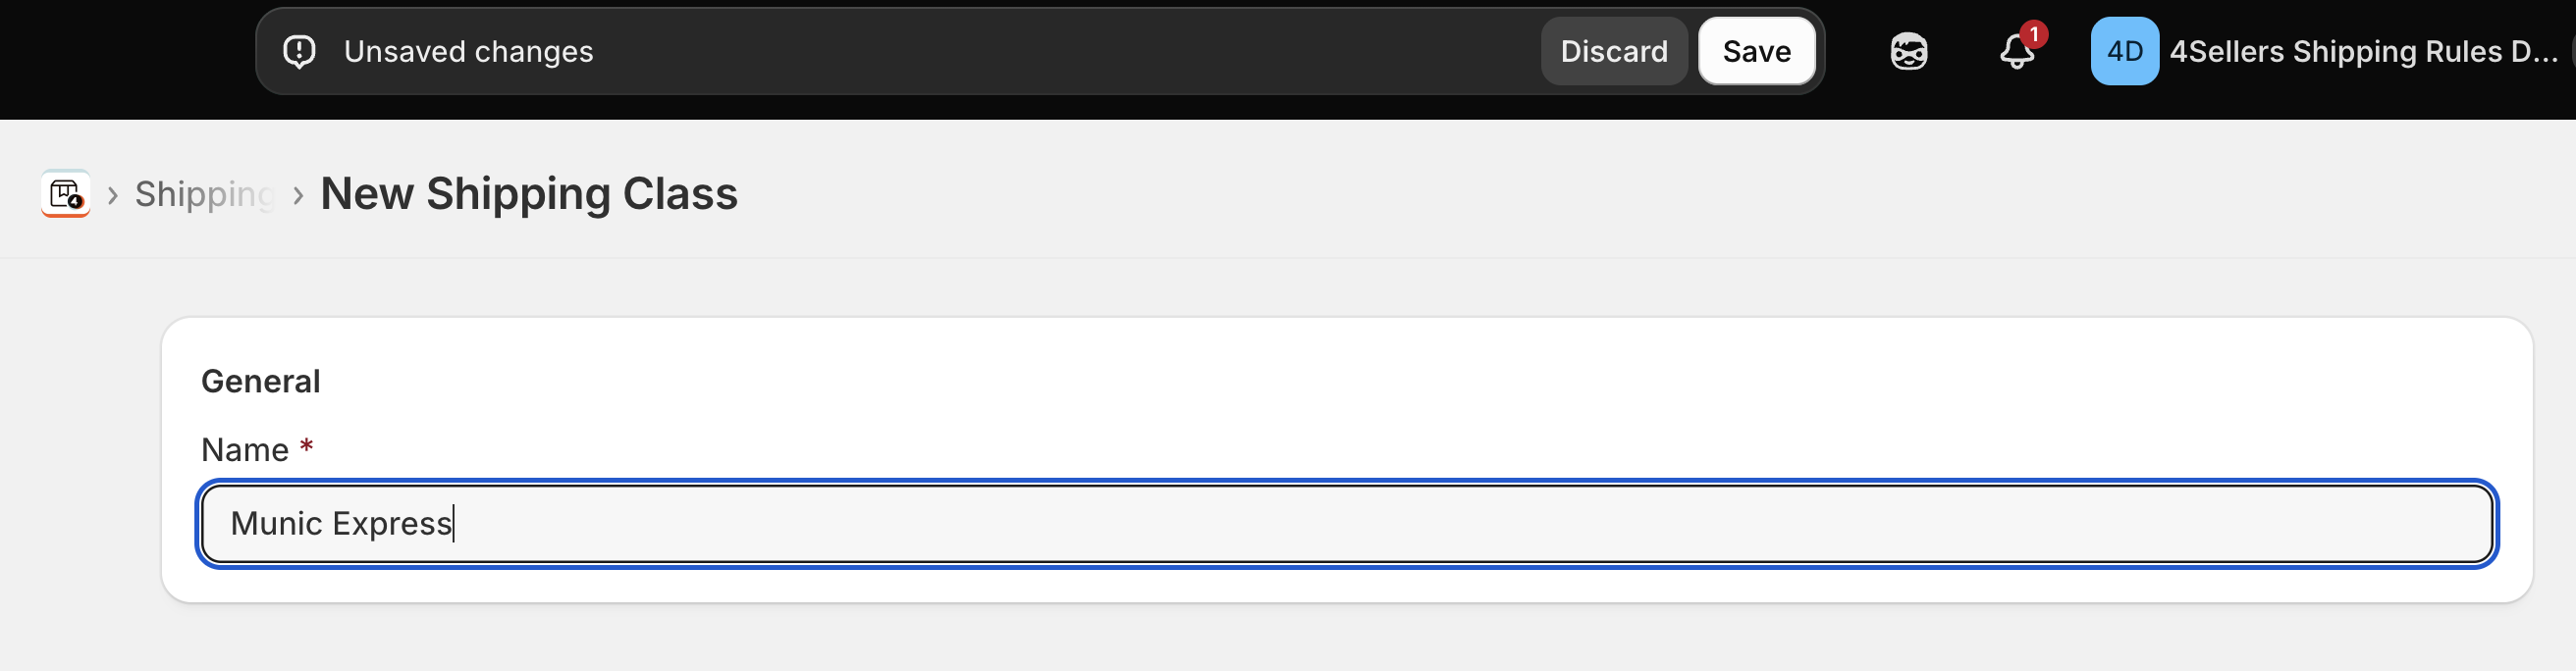
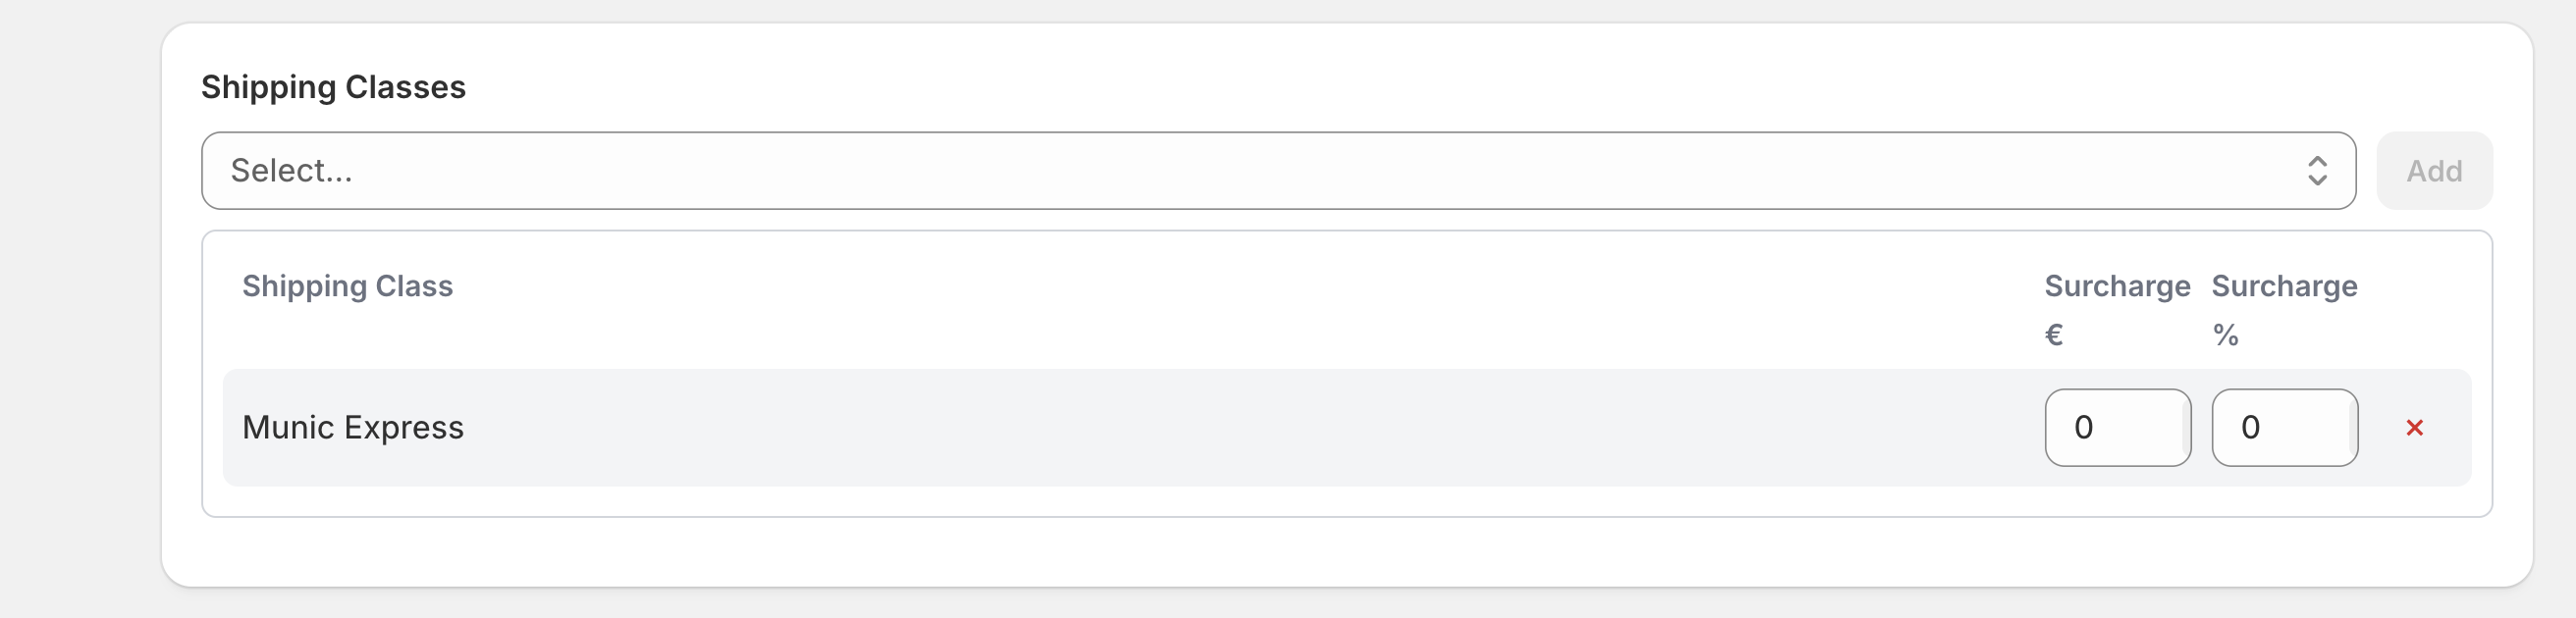
1. Create Shipping Classes
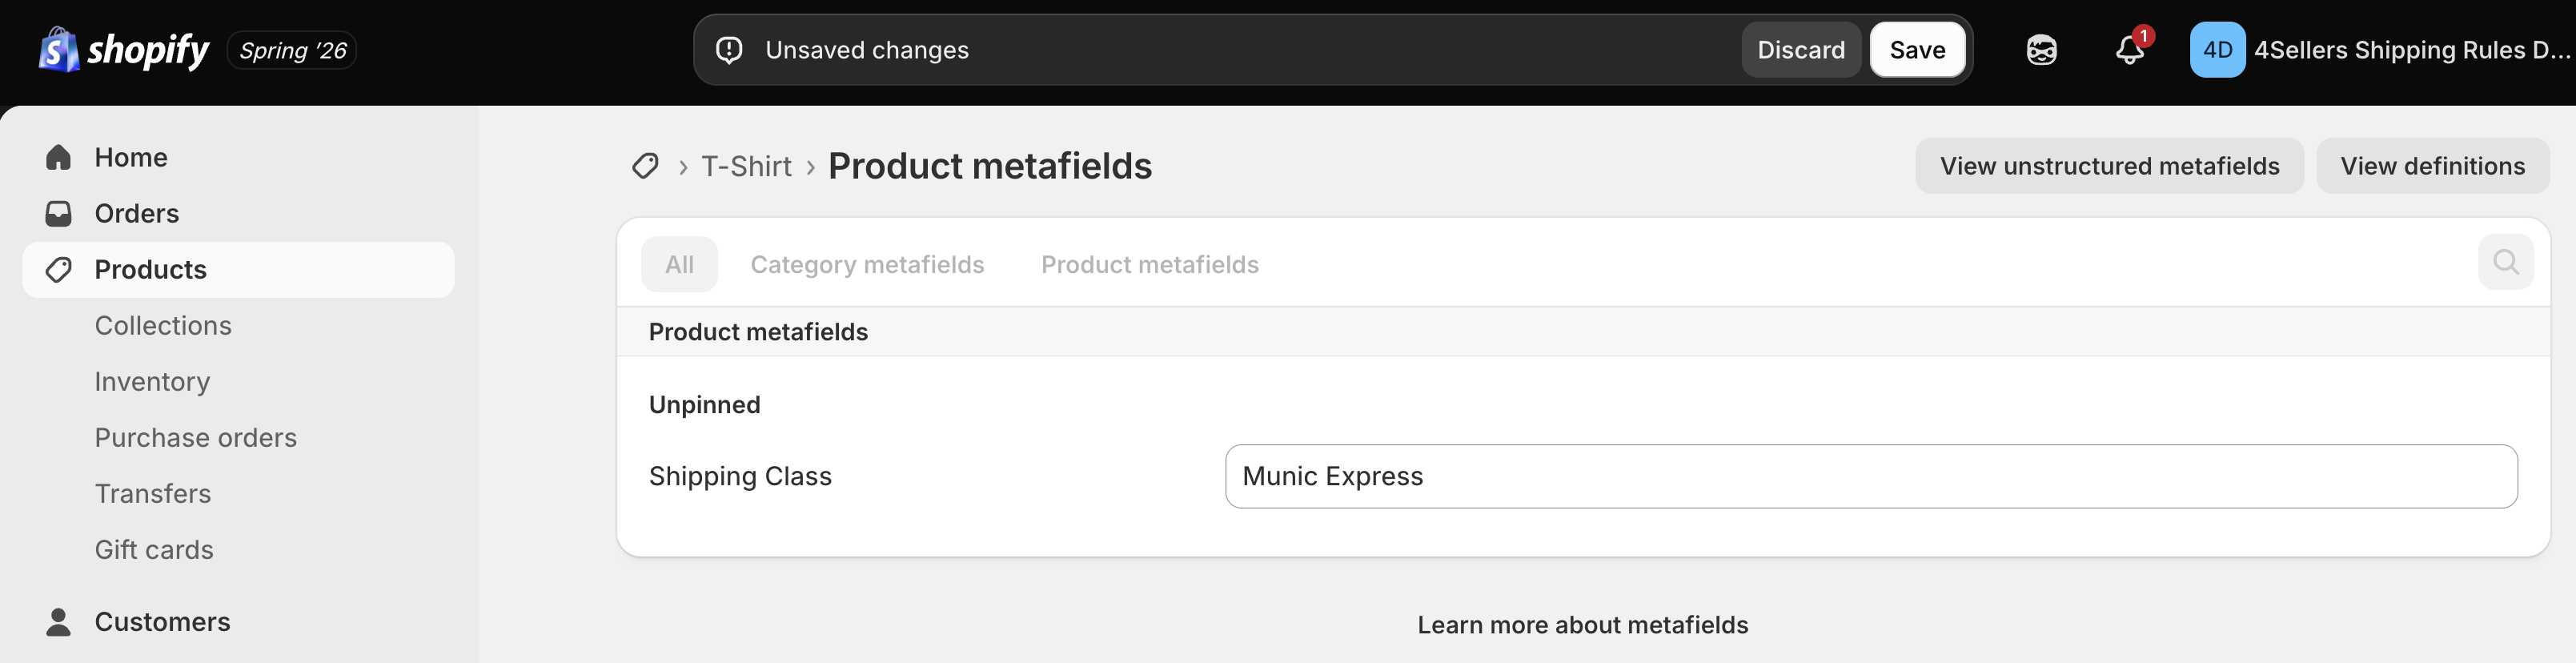
Shipping classes group your products (e.g. "Standard", "Fragile", "Heavy"). You define the class names in the app and then assign them to individual products in your Shopify admin via the Shipping Class metafield.
2. Create Shipping Methods
Shipping methods are the options your customers see at checkout (e.g. "Standard Shipping", "Express"). Methods can be enabled or disabled. After saving, the app syncs them with the General Shipping Profile in Shopify.
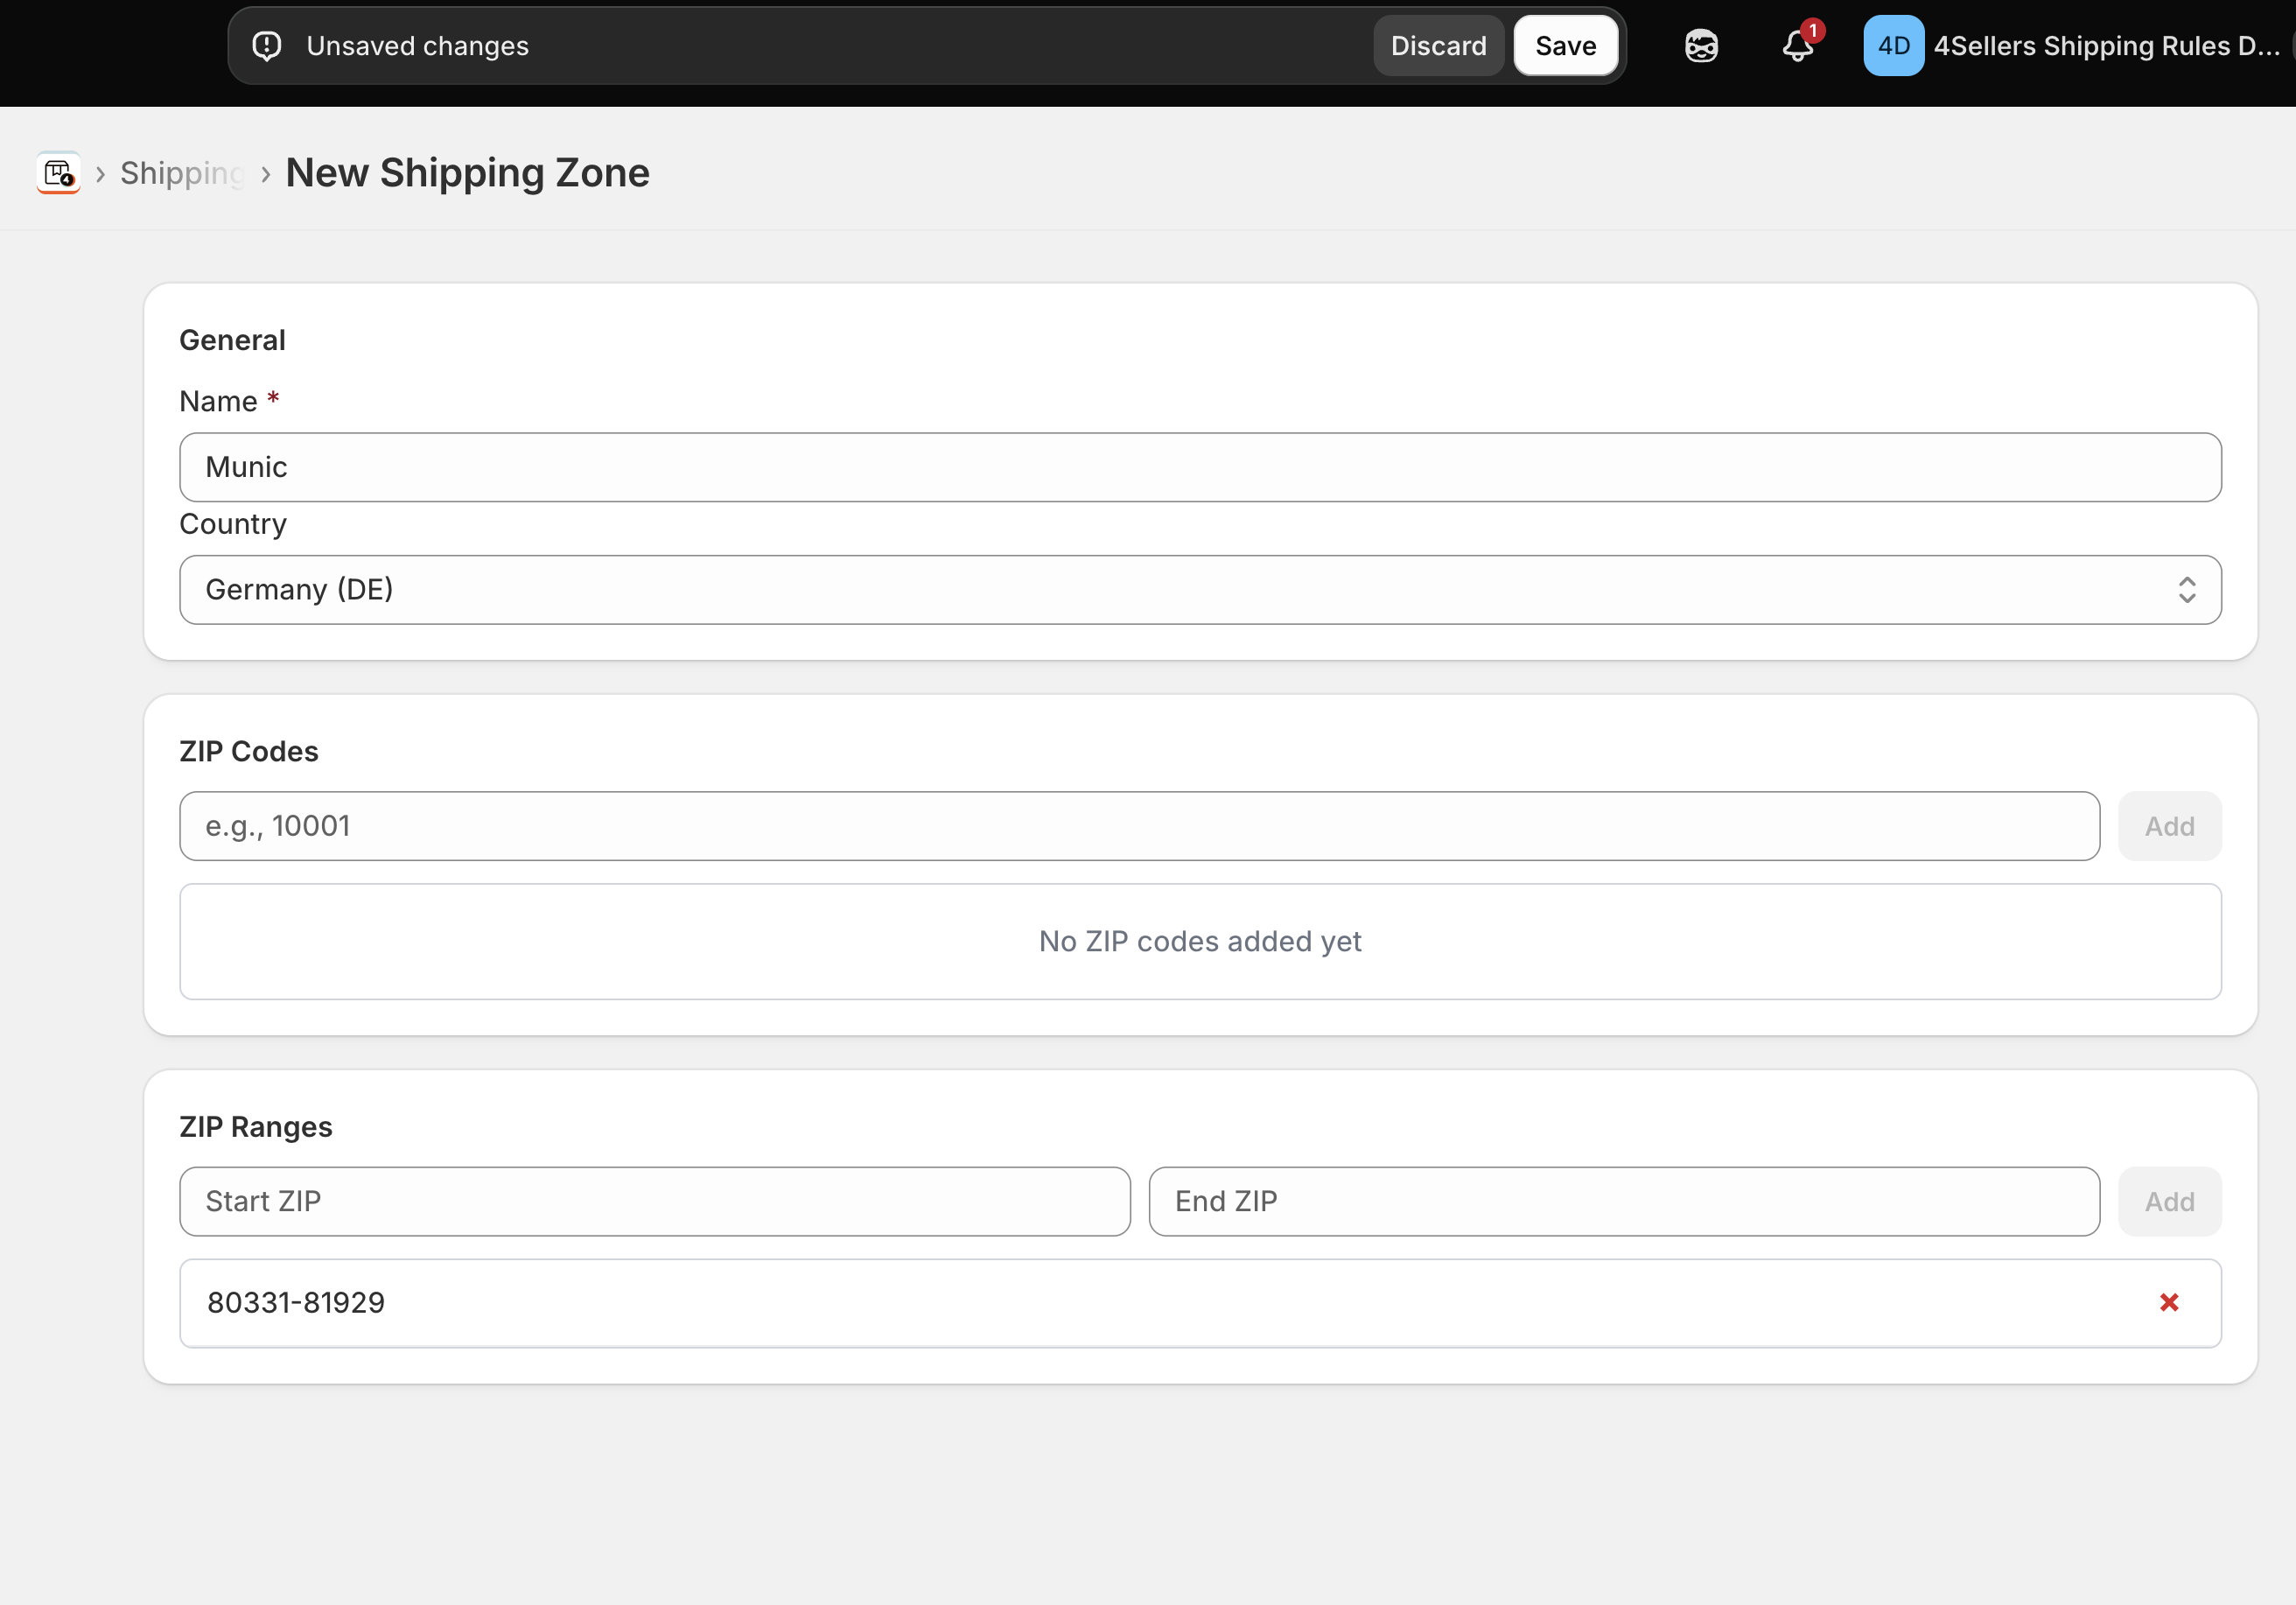
3. Create Shipping Zones
Zones define where you ship. Each zone can include individual postal codes and postal code ranges. You can optionally restrict a zone to a specific country.
4. Create Shipping Rules
Rules connect everything together. A rule defines under which conditions which methods are offered at which price.
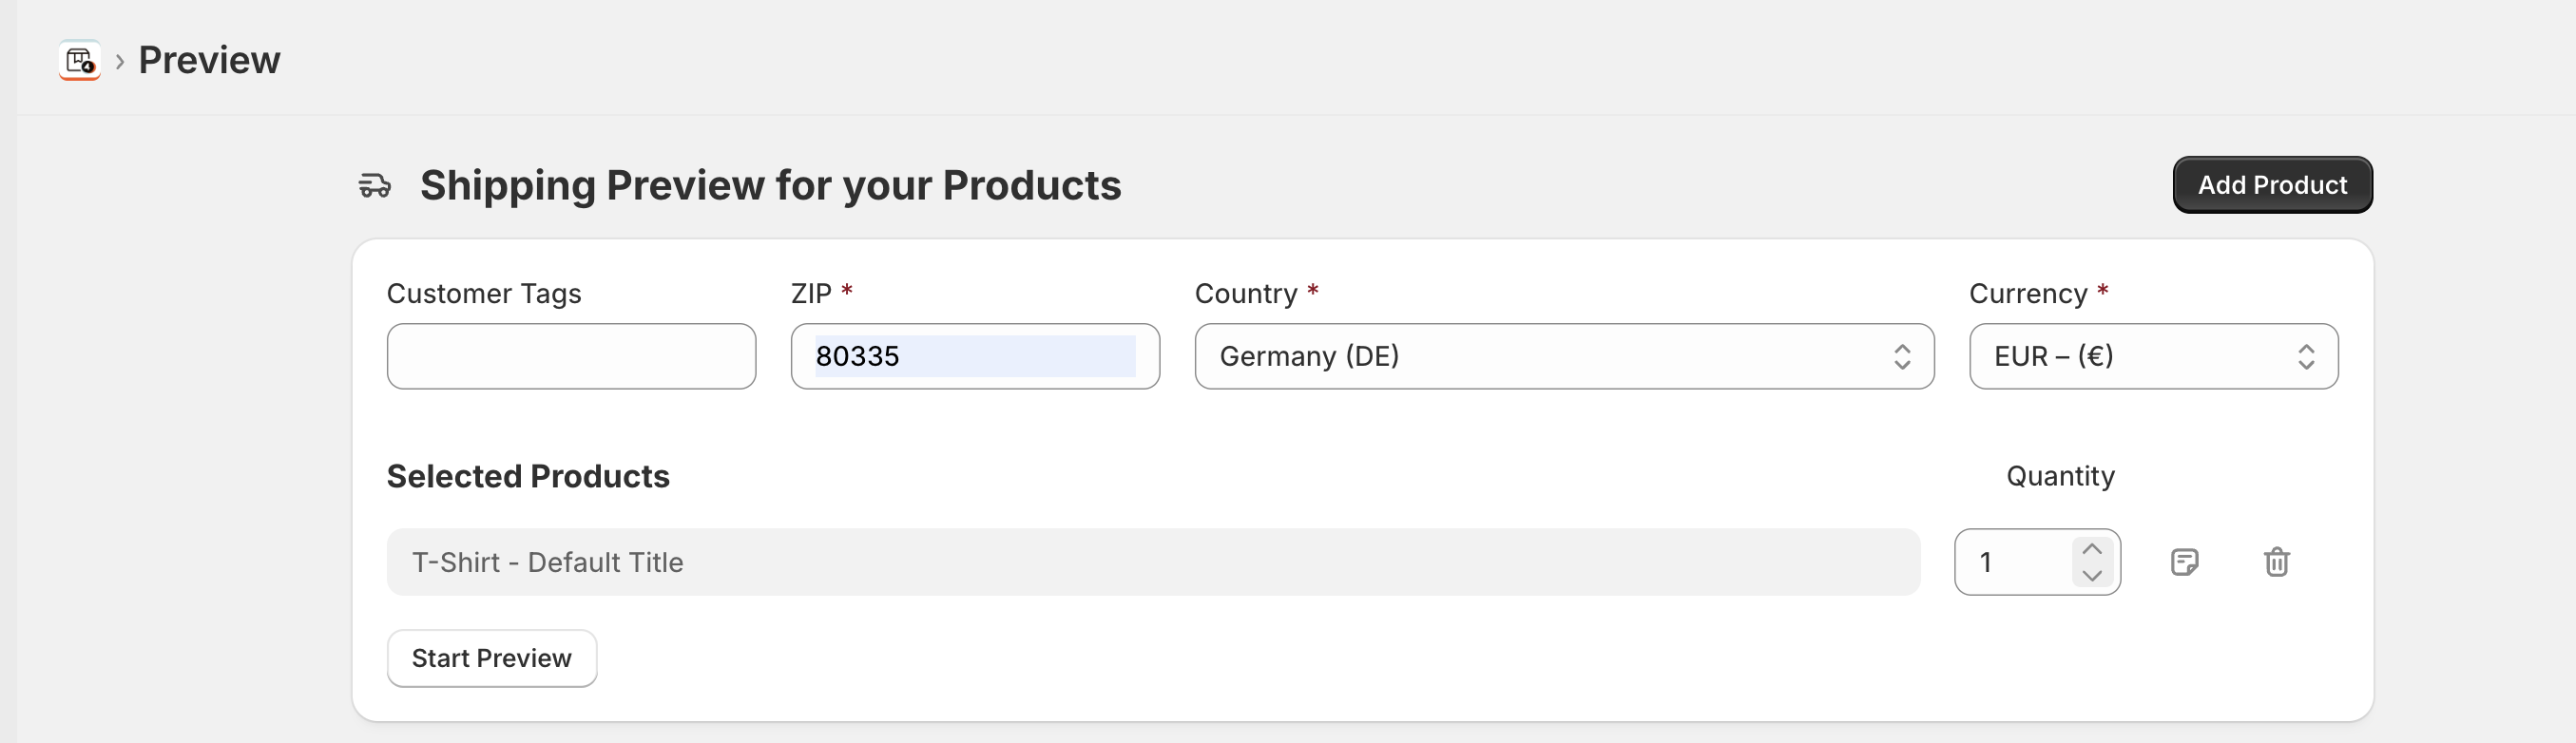
5. Test the New Rule
Enter test data to see an overview of all rules that apply.
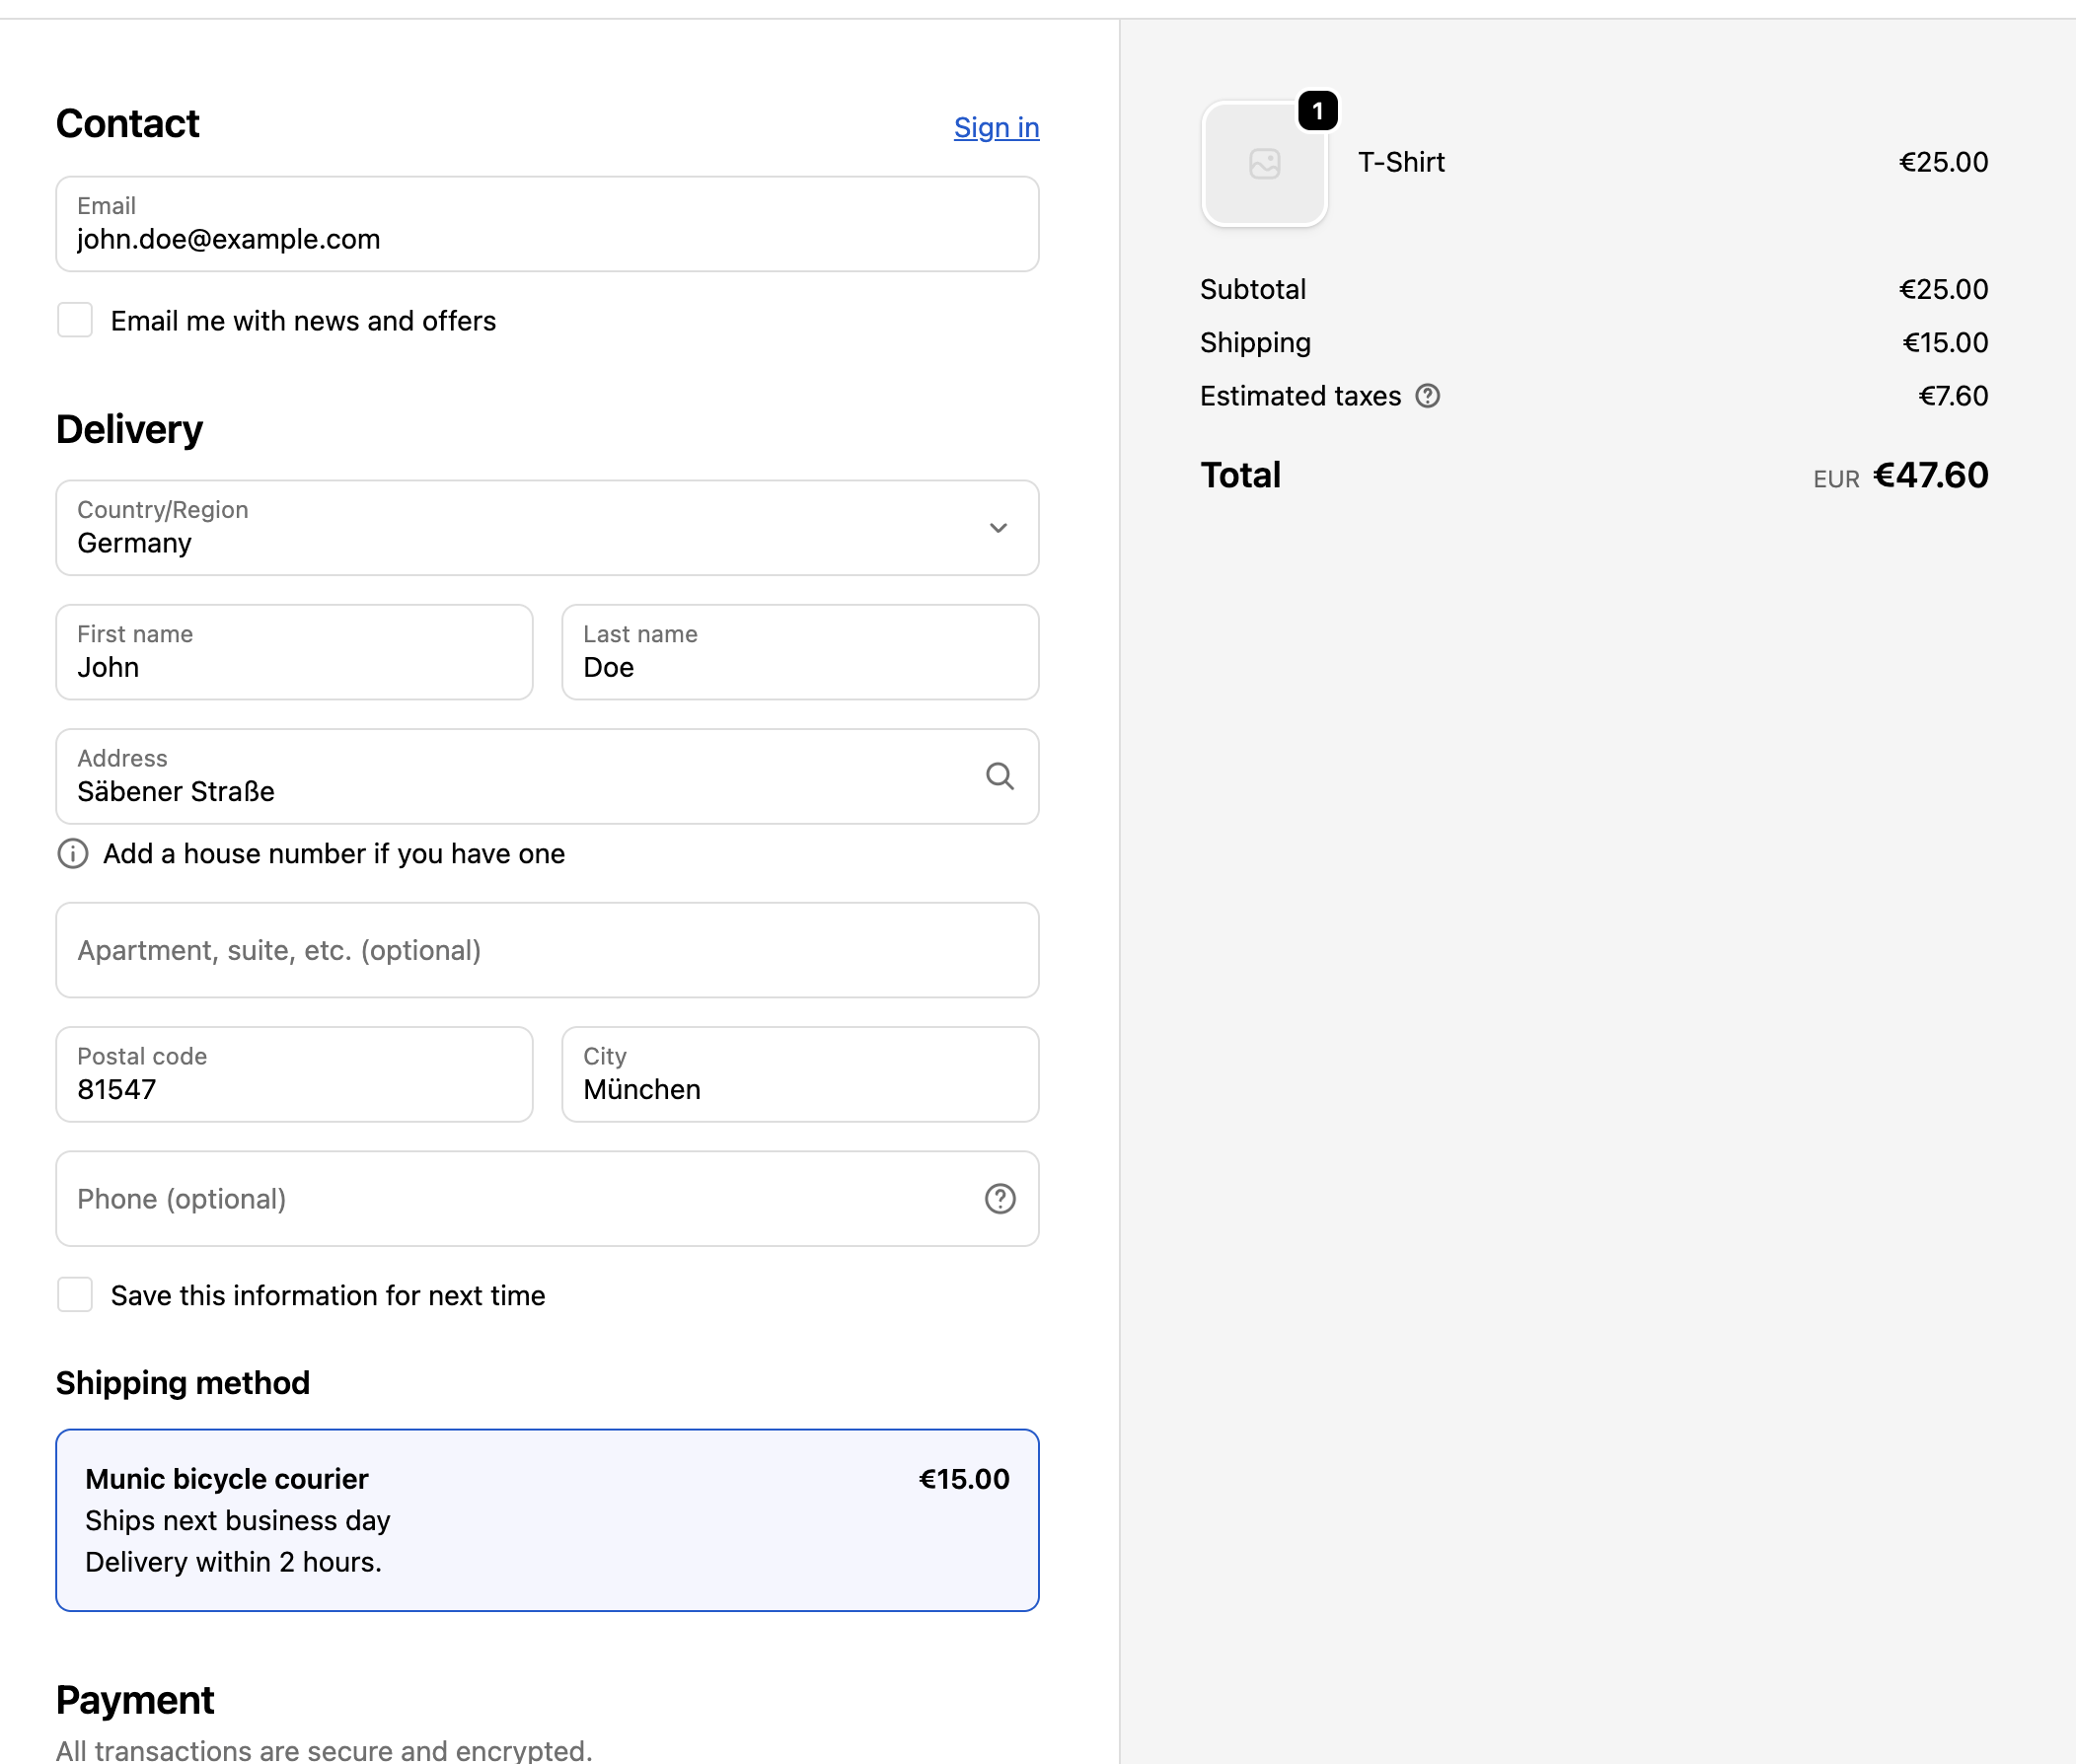
View in Store Checkout
Tip: You can easily duplicate existing rules, zones, and methods. On the detail page, click Copy next to the "Delete" button to use a configuration as a template for a new entry.